
Before a single wall goes up or one drop of concrete is poured, the fate of your entire construction project rests on something you'll probably never see again: the building pad.
Think of it as the launchpad for your home. Just like a rocket needs a perfectly stable base to launch safely, your house relies on an expertly prepared patch of earth to stay level, safe, and structurally sound for generations to come.
What is a Building Pad and Why Is It So Important?
A building pad is far more than just flattened dirt. It's a precisely engineered surface—a stable, level, and compacted area of ground specifically designed to support your building’s foundation. Its primary job is to evenly distribute the massive weight of the structure and prevent any settling or shifting down the road.
Without a properly constructed pad, you’re basically inviting a long list of expensive, frustrating problems. Water can pool against the foundation, causing leaks and moisture issues. A poorly prepared site is a leading cause of foundation failure, which can lead to uneven floors, stuck doors, and alarming cracks in the drywall as the house settles unevenly [NAHB, 2021]. This is a huge risk here on the Central Coast, where the soil conditions in Sonoma and Monterey Counties can change dramatically from one property to the next.
A common misconception is that grading is just about making the land flat. In reality, professional site preparation involves complex soil compaction, precise slope engineering for drainage, and careful layering of materials to create a base that can support thousands of pounds without failing.
Creating this all-important base is the first critical step in any build, and it’s a job for a skilled crew. To learn more about the experts who handle this crucial work, check out our guide on what an excavating contractor does. Their expertise is what ensures the site is ready for everything that comes next.
Key Steps in Building Pad Construction
The process is a lot more involved than just pushing dirt around with a tractor. It requires a methodical approach:
- Clearing and Grubbing: First, we remove all vegetation, rocks, and loose topsoil to get down to the stable subgrade layer.
- Grading and Leveling: Next, we shape the land to the exact elevation and slope required by the building plans. We often use sophisticated GPS-guided equipment to guarantee millimeter accuracy.
- Compaction: This is where the real strength comes from. We compress the soil and any added fill material in thin layers (called "lifts") to increase its density and load-bearing capacity, ensuring it won't sink or shift under pressure.
To put it all together, here’s a quick overview of what goes into a solid building pad.
Building Pad at a Glance: Key Components
| Component | Purpose and Importance |
|---|---|
| Stable Subgrade | The natural ground beneath the pad, cleared of all organic matter and unstable soil. |
| Engineered Fill | Specially selected materials (like gravel or sand) added in layers to build up the pad's height and strength. |
| Proper Compaction | Each layer is mechanically compressed to remove air pockets and achieve maximum density, preventing future settling. |
| Precise Grading | The surface is perfectly leveled for the foundation while ensuring a slight slope away from the structure for drainage. |
| Moisture Barrier | Often a vapor barrier is installed to prevent ground moisture from seeping up into the foundation. |
Ultimately, a professionally built pad is the invisible shield protecting your investment from the ground up. It’s the unsung hero that guarantees your home stands strong, safe, and stable for a lifetime.
How a Professional Building Pad Is Constructed
Creating a solid building pad isn’t just about pushing dirt around. It’s a carefully staged process that takes heavy machinery, a deep understanding of soil science, and a ton of technical skill. Each step is built on the last to create an engineered surface that will support a structure for decades.
Think of it less like clearing a patch of ground and more like building a custom foundation for your foundation. The whole thing kicks off with intensive site preparation. This first phase is called clearing and grubbing, which is contractor-speak for removing every single surface-level obstruction—trees, stumps, big rocks, and most importantly, the organic topsoil. Getting rid of this unstable material is non-negotiable, as leftover roots and decomposing matter create voids that will cause the ground to settle later on.
From Raw Land to Engineered Base
Once the site is stripped down to the stable subgrade, the real earthwork begins. The construction process follows a systematic path to ensure the final product meets the exact specifications from the engineers and local building codes, which is especially critical in the geologically diverse areas of Sonoma and Monterey counties.
This diagram breaks down the basic transformation from raw earth to a house-ready pad.

As you can see, the pad is that crucial middle step, turning unpredictable natural ground into a solid, dependable platform for everything that comes next.
The Science of Compaction and Grading
With the site cleared, the next job is to build the pad up to its required elevation. This is almost never done by just flattening the dirt that’s already there. Instead, we bring in engineered fill material—usually a specific blend of soil and aggregate rock—and add it in thin, uniform layers called “lifts.”
Each lift, typically six to eight inches deep, is systematically compacted using heavy rollers. This is where the magic happens. The intense pressure squeezes out air pockets and moisture, forcing the soil particles to lock together and dramatically increasing the ground's density and load-bearing capacity. Without proper compaction, a building pad is just a mound of loose dirt waiting to fail.
To get it right, professional contractors rely on a lab analysis called a Proctor test. This test tells us the perfect moisture content for a specific soil type to achieve maximum compaction. Out in the field, we use nuclear density gauges to verify that every single lift meets or exceeds the 95% compaction benchmark that most engineers demand.
After the final lift is compacted, the surface is meticulously graded. We use advanced GPS-guided equipment that gives us incredible precision, ensuring the pad is perfectly level and has the exact slope needed for proper drainage. According to industry data, this technology can improve grading efficiency by over 30% [Trimble, 2022].
Choosing the right team for this kind of technical work is everything. For some guidance on how to vet potential partners, use our ultimate excavating contractor checklist to make sure you hire a qualified professional. This systematic approach—from clearing to compaction to the final grade—is what transforms a raw piece of land into a solid base for your future home.
Critical Factors That Define a Quality Building Pad
A building pad that looks flat to the naked eye can still fail spectacularly if the invisible factors aren't handled correctly. It’s about more than just leveling the dirt. A truly solid pad depends on three critical elements: robust soil stability, intelligent drainage engineering, and strategic utility planning.
Getting these right is what separates a short-term fix from a lifelong foundation. This is especially true here in California, where the ground beneath our feet can be anything from expansive clay in Sonoma County to sandy loam along the Monterey coast. Knowing what you're building on is always the first and most important step.
Soil Stability: The Geotechnical Blueprint
Before any heavy equipment starts moving earth, a geotechnical report is absolutely essential. Think of this as a doctor's report for your land. It reveals the ground's composition, its strength, and any potential risks—like its tendency to swell or shrink with moisture changes.
An engineer uses this data to write a precise recipe for building the pad. It specifies the right type of fill material and the exact compaction level required to support your home’s weight for decades without settling.
Ignoring the geotechnical report is like building a house without looking at the blueprints. It’s a gamble that can lead to expensive foundation repairs down the road when the ground inevitably shifts in a way that could have been predicted and prevented.
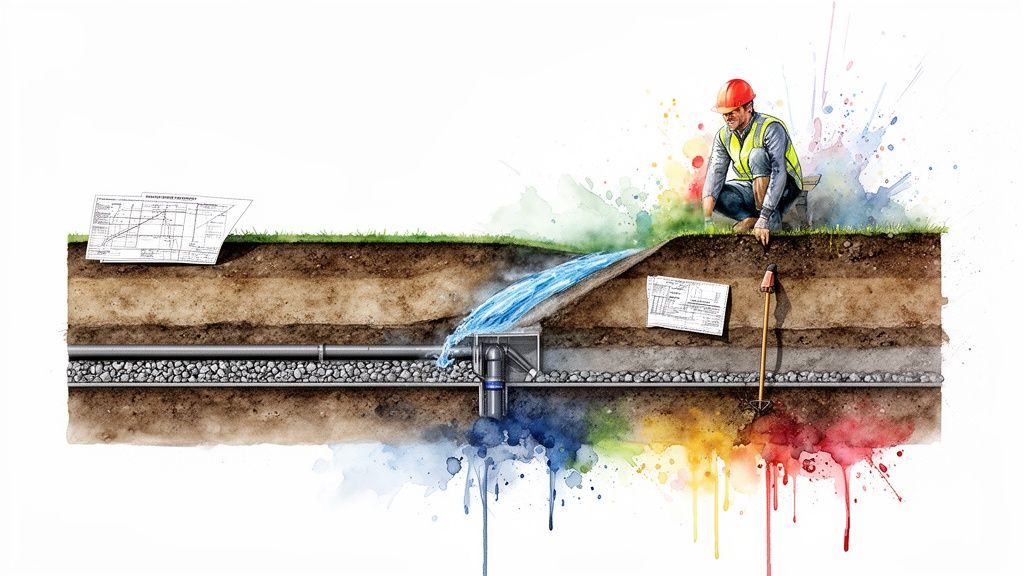
Engineered Drainage: The Unseen Protector
Proper drainage is easily the most underrated aspect of a building pad. The entire goal is to make sure water always flows away from your foundation, never toward it or underneath it.
We achieve this by grading the pad with a subtle, carefully calculated slope. It’s usually unnoticeable to the eye but powerful enough to direct every drop of rainwater to a safe runoff point. This simple measure is your home's first line of defense against leaks, mold, and the kind of hydrostatic pressure that can crack concrete. Poor drainage is a primary factor in over 60% of all residential water intrusion issues [Building Science Corporation, 2019].
Strategic Utility Planning
Finally, a quality pad accounts for what lies beneath. Before the final layer of gravel is laid down and compacted, all the underground utilities have to be meticulously planned and installed. This means digging trenches for:
- Water lines
- Sewer or septic connections
- Electrical conduits
- Gas pipes
Planning this stage correctly prevents the nightmare of having to dig up a brand-new driveway or landscaping because a utility line was forgotten. It’s all about foresight—integrating the home's essential services into the site plan from day one. You can learn more about how this connects to the bigger picture by reading our guide to integrating erosion control and water management.
Common Building Pad Mistakes and How to Avoid Them

Taking shortcuts during site preparation is a surefire way to create a lifetime of structural headaches. The building pad is the literal starting point for your home's stability, and even tiny mistakes here can mushroom into massive, expensive problems down the road.
Understanding these common failures is key. It helps you recognize quality work and appreciate why professional expertise is non-negotiable. Many of these issues trace back to a contractor rushing the job or simply not understanding the unique geology of a site. Worse, the mistakes often stay hidden until long after the checks are cashed, leaving you to deal with the fallout.
Improper Soil Compaction
This is the big one. In fact, it's probably the single most critical mistake you can make. When fill material isn't compressed correctly, in thin, meticulous layers, it leaves behind tiny air pockets. Under the crushing weight of a foundation, those pockets will eventually collapse.
This collapse leads to settlement—the root cause of cracked foundations, floors that slope, and doors that never seem to shut right. Imagine a Sonoma County homeowner whose contractor skipped a few compaction passes to save time. A year later, a corner of their new ADU has sunk by an inch, cracking the stucco and forcing thousands of dollars in underpinning repairs. It's a painfully common story, and it's completely avoidable.
Using the Wrong Fill Material
Let's be clear: not all dirt is created equal. Using native soil that’s full of organic material like roots and topsoil, or bringing in expansive clay, is a recipe for disaster. This stuff will either decompose or swell with moisture, creating voids and instability right under your home.
A professional contractor will always insist on engineered fill—a specific mix of soil and aggregate prescribed by a geotechnical engineer. This material is chosen for its predictable stability and drainage properties, ensuring the building pad stays solid for generations.
Poor Drainage Design
A building pad that looks perfectly flat to the naked eye is often a poorly designed one. A slight, almost imperceptible grade is absolutely essential to channel water away from your foundation. Without it, rainwater pools against the concrete, creating hydrostatic pressure that can lead to flooded basements, mold, and serious long-term water damage.
Avoiding these issues starts with hiring an experienced team that doesn't believe in cutting corners. A well-built pad is a secure, long-term investment in your property’s safety and value. To see what sets a professional approach apart, you need to understand the truth about excavation projects most contractors don’t tell you.
Navigating Building Pad Costs and Permits in California
Let's talk about the two things that can keep any construction project owner up at night: the budget and the paperwork. When it comes to your building pad, these two are tangled together, especially here in California where the rules are strict and the ground under our feet is anything but uniform. Getting a handle on your costs and lining up the right permits isn't just a good idea—it’s the essential first step.
The price tag on a building pad is never a simple, off-the-shelf number. It’s a direct reflection of your specific property. Key factors like the steepness of the lot, the type of soil we're working with, and how much dirt needs to be moved or brought in all play a huge role. A flat, stable lot in Windsor is a completely different ballgame than a steep, rocky hillside in Monterey County that demands serious excavation and engineered fill.
What Drives the Cost of a Building Pad?
Several moving parts will influence your final invoice. It's so important to remember that the cheapest bid you get is often a red flag for cut corners, which can lead to jaw-droppingly expensive repairs down the road. A professional, transparent quote will always account for the real-world variables:
- Site Accessibility: How tough is it to get heavy machinery to the actual work area? Tight access or steep driveways can add time and complexity.
- Soil Conditions: Are we dealing with solid ground, or is the native soil weak and needs to be dug out and replaced with engineered fill?
- Grading Complexity: Is this a straightforward "cut and fill" on a gentle slope, or are we looking at a major excavation for a walk-out basement or multi-level foundation?
- Permit and Inspection Fees: These are non-negotiable costs set by local jurisdictions like Sonoma County, and they definitely add up.
All told, site preparation—including that all-important building pad—can easily make up 5-15% of your total project costs on a typical residential build [HomeAdvisor, 2023]. When you’re investing that much, you have to get it right the first time.
Demystifying the California Permitting Process
Before a single shovel hits the ground, you're going to need a grading permit from your local city or county planning department. This isn't just bureaucratic red tape. It's a critical safety check to ensure the work is done correctly and won't create erosion or flooding problems for you or your neighbors.
A huge point of confusion for many homeowners is the geotechnical report. In California, this report is almost always a requirement to even apply for a grading permit. It’s the playbook that gives engineers the data they need to design the pad and foundation, and it’s what city inspectors will use to sign off on the work.
Getting through this process smoothly requires a contractor who knows the local rulebook inside and out. They’re the ones who will manage the permit application, coordinate with the engineers and surveyors, and schedule every necessary inspection. This expert guidance is a fundamental piece of a comprehensive site plan. To see how all these moving parts come together, take a look at our guide on what a site plan is and who can help create one.
Why a Professional Building Pad Is a Non-Negotiable Investment
You've done all the planning, designing, and dreaming. Now, the real, long-term success of your entire project comes down to one critical step you’ll probably never see again: the building pad. It’s the invisible groundwork, the literal bedrock that supports everything else.
Almost any serious structural problem—from annoying drywall cracks to catastrophic foundation failure—can usually be traced right back to a poorly built pad. That’s why getting this part right isn't just a "best practice." It's the single most important investment you can make in your property's future.
For anyone planning to build in Northern and Central California, whether it's a custom home in Sonoma County or a new ADU in Monterey, this foundational work is non-negotiable. It demands true professional expertise. Starting your build on solid ground doesn’t just give you structural integrity; it buys you peace of mind for decades. It's the difference between a house that simply stands and one that stands the test of time.
Frequently Asked Questions About Building Pads
Getting ready to build means you probably have lots of questions about what happens before the first wall goes up. Here are answers to some of the most common ones we hear from homeowners and builders in the Central Coast.
How long does it take to create a building pad?
This really depends on the property. For a straightforward residential lot on flat ground with good soil, we can often have the pad graded, compacted, and ready in just a few days to a week. However, many properties on the Central Coast aren't so simple. Hillside projects in areas like Sonoma County can take significantly longer, as they often demand extensive grading and importing engineered fill.
What is the difference between a building pad and a foundation?
This is a great question. The building pad is the perfectly prepared, compacted ground underneath your home. The foundation (like a concrete slab) is the structural base that's built directly on top of the pad. One can't work without the other; the pad creates the solid, level surface the foundation needs to function correctly.
Do I need a soil report before creating a building pad?
Yes. In nearly every jurisdiction in California, including Monterey and Sonoma counties, a geotechnical (soil) report is required before you can even get a grading permit. Don't think of it as a hurdle—it's your project's insurance policy. This report tells us everything about your land's stability and how much weight it can safely support.
Can I build on a sloped lot in Sonoma County?
You absolutely can. Building on a slope is a common challenge we handle all the time. The key is a specialized excavation technique called "cut-and-fill," where we cut into the high side of the slope and use that excavated soil (the "cut") to build up the low side (the "fill"). This technical job requires an experienced crew to prevent the pad from settling or sliding.
How thick does the gravel base need to be?
There’s no one-size-fits-all answer here; the right thickness is determined by the soil report and the foundation design. Typically, you'll see a compacted aggregate base ranging from four to twelve inches deep. But that number could be higher or lower depending on what the geotechnical engineer specifies to ensure proper load distribution and drainage.
Your project's success starts from the ground up. At DW Excavation, we specialize in creating precisely engineered building pads that provide lasting stability for homes and ADUs across Sonoma and Monterey Counties. Contact us today to ensure your build starts on solid ground.