
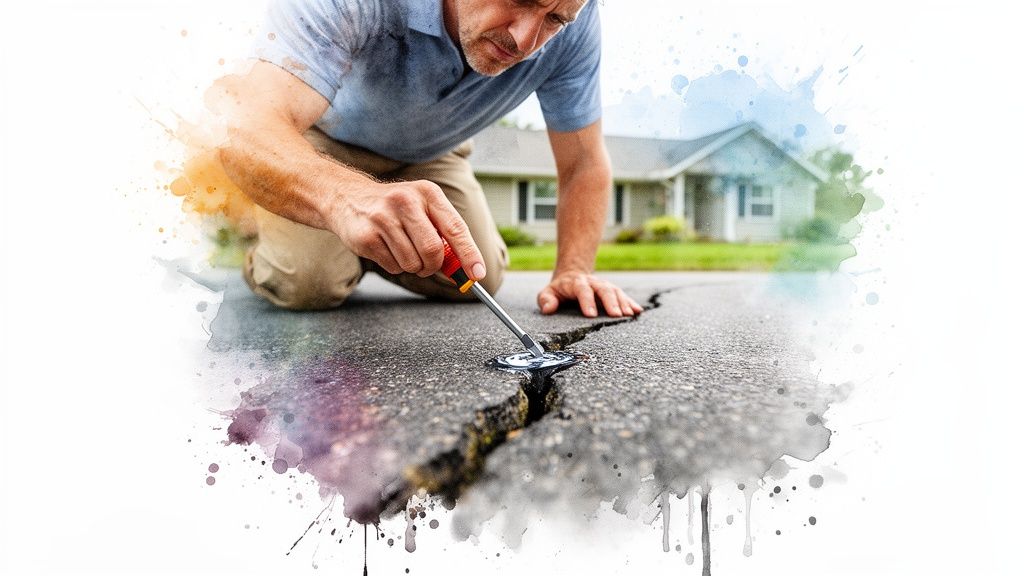
Fixing a crack in your asphalt driveway is about more than just aesthetics—it's about protecting your investment. A little bit of cleanup, the right filler, and a smooth application can stop water damage in its tracks and prevent much bigger headaches down the road.
Why You Shouldn't Ignore Cracks in Your Asphalt Driveway
That first little crack in your driveway might seem like a minor cosmetic issue, but ignoring it is one of the most expensive mistakes you can make as a homeowner. What starts as a harmless-looking fracture is really an open door for moisture to creep underneath the asphalt.
This is a huge deal, especially for properties in Sonoma County and along the California Central Coast, where our seasonal rains can turn a small problem into a big one, fast. Once water gets in, it goes to work eroding the subgrade—that's the crucial foundation holding up your entire driveway.
The Hidden Damage Water Causes
You won't see this damage happening until it's already serious. Even in our milder climates, the freeze-thaw cycle causes trapped water to expand and contract. This relentless pressure weakens the asphalt from below, turning tiny cracks into wide, ugly gaps and, eventually, full-blown potholes.
Putting off a simple repair job creates a domino effect. Research from the National Center for Asphalt Technology has confirmed that unsealed cracks dramatically drive up the long-term costs of driveway ownership.
How Proactive Sealing Saves Money
On the flip side, sealing those cracks as soon as you see them pays off big time. Proactive sealing can extend your driveway's life by two to five years, a much better outcome than just letting nature take its course [International Journal of Pavement Engineering, 2014]. You can dig into the full findings on crack sealing performance to see the data for yourself.
Quick Guide to Asphalt Crack Types and Solutions
Use this table for a quick diagnosis of your driveway issue. It helps you distinguish between a manageable weekend project and a problem that needs an expert eye.
| Crack Type | What It Looks Like | Likely Cause | Recommended Action |
|---|---|---|---|
| Hairline Cracks | Thin, shallow lines on the surface | Normal aging and sun exposure | DIY-friendly. Clean and apply a pourable liquid crack filler. |
| Edge Cracks | Cracks running parallel to the driveway's edge | Lack of proper edge support, soil drying out | DIY possible. Clean, fill with a thicker sealant. Monitor for worsening. |
| Alligator Cracking | Interconnected cracks resembling reptile skin | Serious subgrade failure. The foundation is compromised. | Call a professional. This is a red flag that the base layer has failed. |
| Potholes | Gaping holes in the asphalt | Water damage from unsealed cracks, heavy loads | Pro help needed. Requires a multi-step patch with new asphalt. |
Seeing alligator cracks or potholes means the problem is deeper than the surface. At this point, you're past a simple DIY fix.
From Small Cracks to Big Problems
Think of a small crack as a warning sign. Here’s what you’re trying to avoid by fixing it early:
- Alligator Cracking: This pattern of interlocking cracks looks just like its name suggests and is a clear sign of subgrade failure. It means the foundation can no longer support the weight of your vehicles, and just patching the top won't fix the root cause.
- Potholes: When smaller cracks are left open, chunks of asphalt eventually break loose, creating potholes. These are a tripping hazard that lets huge amounts of water flood the base layer, accelerating foundational damage.
- Structural Failure: If left unchecked, widespread cracking leads to a total structural breakdown. The driveway becomes unsafe and an eyesore, and a complete replacement—costing thousands—is often the only way forward.
Taking care of minor repairs quickly saves you from these major headaches.
How to Identify Different Types of Driveway Cracks
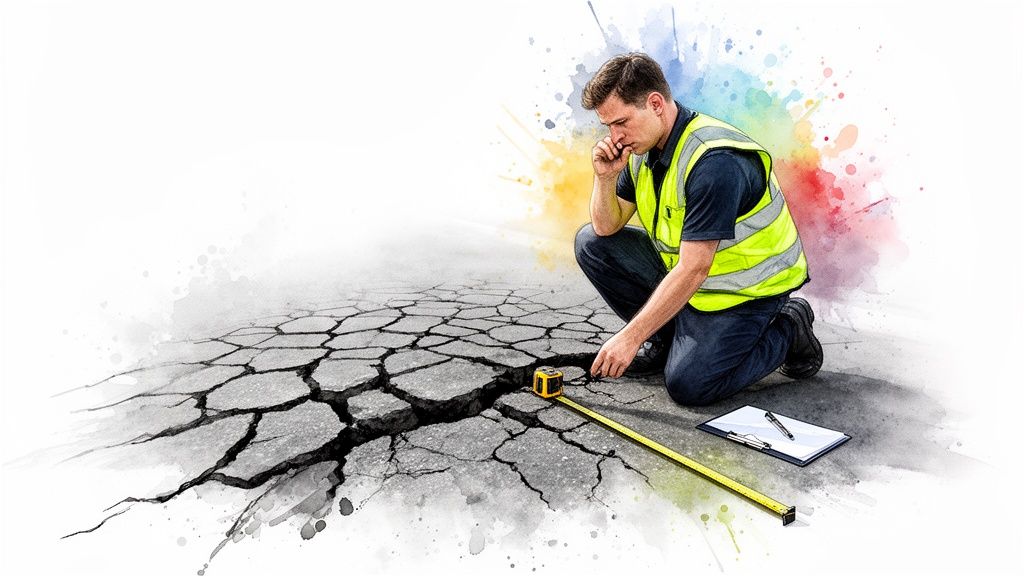
Before you can patch a crack in your asphalt, you need to play detective. Figuring out exactly what kind of crack you’re dealing with is the single most important step, because each one tells a different story about what’s happening underneath.
A Simple Diagnostic Trick
Here’s a trick I tell homeowners: grab a flathead screwdriver and a small wire brush. First, use the brush to really clean out any loose bits from inside the crack. Then, gently poke around with the screwdriver to get a feel for its depth, width, and whether the edges are solid or crumbly.
Hairline and Transverse Cracks
Hairline cracks are the ones you'll see most often and are the least scary. They are super thin, shallow fractures that often spiderweb across the surface, usually from the sun's UV rays breaking down the asphalt binder.
Transverse cracks run straight across the width of your driveway, pretty much perpendicular to its length. Sometimes these are leftover from a shoddy paving job, but more often they’re caused by the asphalt contracting in colder weather.
Edge Cracks
Ever notice cracks running parallel to the sides of your driveway? Those are edge cracks, and they’re a big red flag for poor support. This usually means the soil or gravel base along the perimeter has washed away or compacted, leaving the asphalt hanging with nothing underneath.
The Most Serious Sign: Alligator Cracking
If a section of your driveway looks like the scaly back of an alligator—a web of interconnected cracks—you need to stop and pay close attention. We call this alligator cracking (or fatigue cracking), and it’s the most serious type of damage.
This is not just a cosmetic flaw; it is a clear symptom of foundation failure. It means the subgrade—the soil and gravel base your driveway is built on—can no longer handle the weight. You can learn more about how to prevent this by reading our article on why Monterey driveways fail after rain and how proper grading fixes it.
Simply pouring filler into these cracks is like putting a bandage on a broken bone. This is where a DIY job stops and a professional assessment begins.
A Practical Guide to Repairing Driveway Cracks
So you've sized up the cracks in your driveway and are ready to get your hands dirty. Tackling those minor, non-structural cracks is the perfect weekend project—one that pays off big time in protecting your investment.
How to Prepare the Crack for a Lasting Repair
Rushing the prep is easily the #1 mistake homeowners make. Your patch is only as good as the surface it’s sticking to, so cutting corners here just means you'll be doing this all over again next year.
First things first, you have to get all the junk out of that crack. A stiff wire brush and a basic flathead screwdriver are your best tools for this. Scrape out any crumbling asphalt, weeds, dirt, or old filler.
Once you’ve loosened all the debris, grab a shop vac or a leaf blower and blast everything out. For a truly clean surface, a pressure washer is fantastic—just make absolutely sure the crack is bone dry before you start filling.
This visual shows how quickly small problems can escalate if you ignore them.
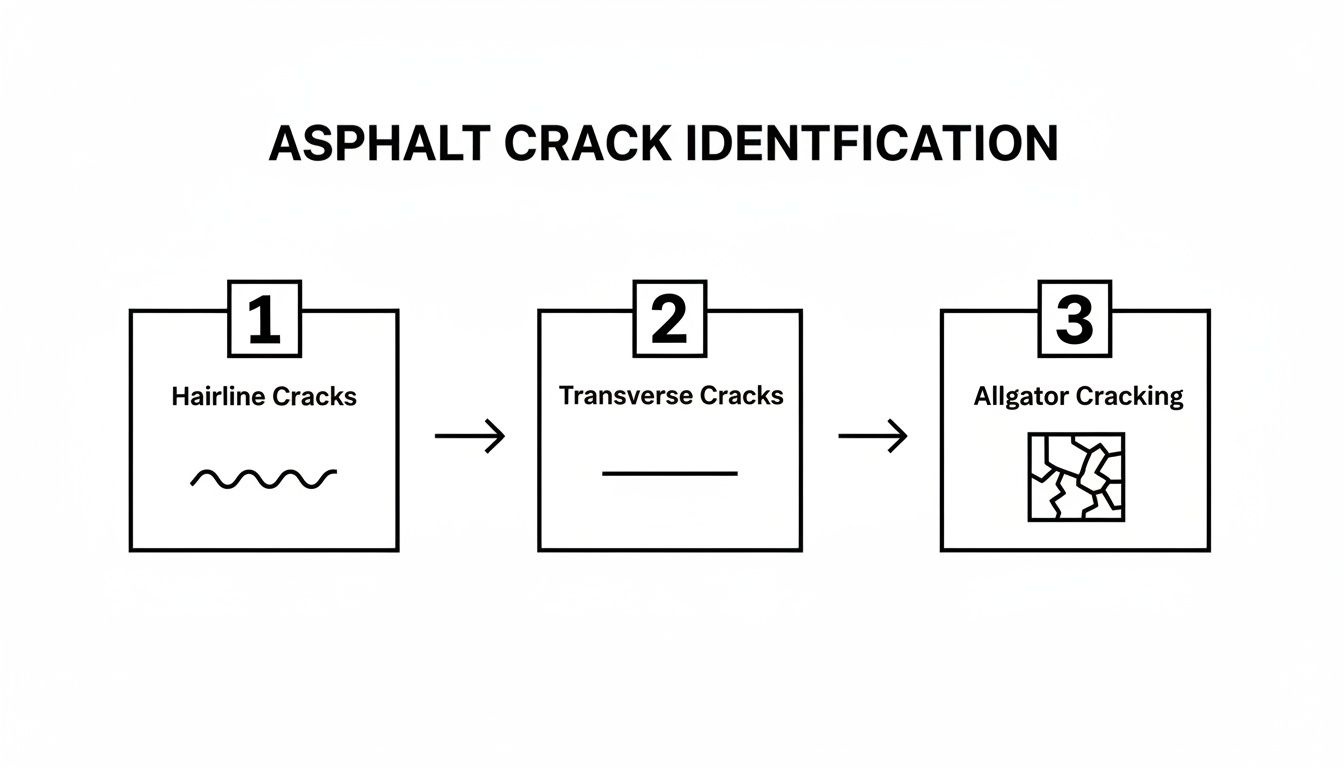
As you can see, what starts as a harmless-looking hairline crack can eventually break down into severe alligator cracking. This is why getting on top of repairs early is so important.
How to Choose the Right Crack Filler
The sealant you pick needs to match the crack you're fixing. This isn't a one-size-fits-all situation.
- For Hairline Cracks (Under 1/8 inch): Go for a thin, pourable cold-pour liquid filler. It flows deep into tiny fractures to create a waterproof seal.
- For Medium Cracks (1/8 to 1/2 inch): You'll need something thicker, like a rubberized cold-pour sealant. These have more body and flexibility to move with the asphalt.
- For Wide Cracks (Over 1/2 inch): Start with a foam backer rod. Push this flexible foam rope into the crack, leaving about a half-inch of space at the top. Then, apply your rubberized sealant right over it.
The Application and Curing Process
Applying the filler is pretty straightforward. Squeeze a consistent bead into the crack, moving slowly so it fills the void completely. Then, use a small putty knife to smooth the surface.
Now for the most important part: patience. Every filler has a specific curing time printed on the label—read it and follow it. Keep all foot traffic off the repair for at least 4–8 hours and don't drive on it for a full 24–48 hours.
The Financial Sense Behind Sealing
Crack sealing is hands-down one of the most cost-effective maintenance tasks you can do. For homeowners in Sonoma County with aging driveways, this simple step is your best defense against a full replacement, which can easily cost anywhere from $3,000 to $10,000.
For a deeper dive into specific asphalt crack filling techniques and how they protect the pavement, this guide is a great resource.
Understanding The Costs Of DIY vs. Professional Repair
When you spot a crack spreading across your driveway, one of the first things you probably think is, "What's this going to cost me?" The answer boils down to whether you do it yourself or bring in a pro.
A small repair today can easily save you from a massive, multi-thousand-dollar driveway replacement in a few years. A professional opinion can spot the root cause of the problem, making sure you aren't just slapping a bandage on a much bigger issue.
What is the Budget For a DIY Repair?
For those smaller hairline or transverse cracks, going the DIY route is definitely the most wallet-friendly path. Most homeowners can get everything they need for between $50 to $150.
A gallon of good rubberized crack sealant, which is enough to cover several hundred feet of cracks, will run you about $30-$50. The biggest "cost" here is your own time, but for a few hours of work, the payoff is huge.
How Much Do Professional Repairs Cost?
When you hire a professional, you're paying for experience, efficiency, and heavy-duty equipment. Costs can swing depending on how bad the damage is.
- Professional crack sealing for an entire driveway usually ranges from $100 to $400.
- For individual cracks, contractors often charge between $1 to $3 per linear foot.
- For bigger problems like potholes, the price shifts to $2 to $5 per square foot.
While the total average for major asphalt driveway repairs can run from $1,071 to $4,021, these smaller, preventative fixes are on the much lower end of that scale [Angi, 2024]. You can learn more about how these repair costs break down.
Cost Comparison DIY vs Professional Asphalt Repair
Deciding which path to take often comes down to the numbers. Here’s a simple breakdown to help you weigh the costs against the benefits.
| Repair Type | Estimated DIY Cost | Estimated Professional Cost | Best Suited For |
|---|---|---|---|
| Hairline Cracks | $25 – $75 | $100 – $300 | Small, simple repairs; homeowners comfortable with basic hand tools. |
| Wide Cracks (1/2" – 1") | $50 – $150 | $200 – $500 | More significant cracks that still have a solid base below them. |
| Alligator Cracking | Not Recommended | $400 – $1,200+ | Widespread surface damage indicating potential base issues. |
| Pothole Repair | $75 – $200 | $150 – $450 per pothole | Isolated potholes in an otherwise stable driveway surface. |
This table shows that while DIY is great for minor fixes, the value of professional service becomes clear as the damage gets more complex.
When Is Professional Help Worth The Investment?
The DIY-or-pro decision really hinges on how deep the problem goes. If you're looking at widespread "alligator" cracking or sections of your driveway that have sunken, the problem isn't just on the surface—it's with the foundation underneath.
In those cases, calling a professional isn't just about convenience; it's a necessity. You might need to find out if you need grading before you repave your driveway to give the new asphalt a solid, lasting base.
When Your Driveway Needs More Than a DIY Fix
While tackling minor driveway cracks can be a rewarding weekend project, knowing your limits is the most important part of the job. Some problems are more than just cosmetic flaws; they’re symptoms of a much deeper issue that a bottle of crack filler just can't solve.
Recognizing the red flags that signal a serious problem is key. If you see these signs, it's time to put down the tools and get a professional assessment.
What are Signs Your Driveway Has a Deeper Problem?
Certain types of damage are clear giveaways that the subgrade—the essential foundation beneath your asphalt—is failing. This is usually caused by poor drainage, soil erosion, or a base that wasn't compacted properly during the original installation.
Pay close attention to these warning signs:
- Widespread Alligator Cracking: This spiderweb of interconnected cracks is the #1 sign of structural failure.
- Sunken Areas or Depressions: If you notice low spots where water pools every time it rains, your subgrade has likely settled or washed away.
- Deep, Recurring Potholes: A pothole that you've patched before, only to have it reappear the next season, is telling you the issue isn't the patch; it's the unstable ground beneath it.
- Severe Upheaval or Buckling: Asphalt that's being pushed upward is often caused by invasive tree roots or frost heave.
Why Surface Repairs Fail on Unstable Ground
Think of your driveway's asphalt layer as the roof of a house and the subgrade as its foundation. If the foundation crumbles, it doesn't matter how many new shingles you put on the roof; the whole structure is compromised.
A professional assessment doesn't just look at the crack; it diagnoses the cause. Is water pooling due to improper grading? Answering these questions is the only way to design a repair that actually lasts.
The Professional Approach to a Lasting Solution
When a driveway's foundation has failed, the only effective solution is to address the root cause with professional equipment and expertise. This is where a proper, engineering-minded approach becomes critical.
A professional team will:
- Diagnose the Root Cause: First, we use our experience to figure out why the driveway is failing. Our guide on how poor grading wrecks driveways explains this connection in more detail.
- Excavate the Damaged Area: Next, we remove the failed asphalt and the compromised subgrade material underneath it.
- Rebuild the Foundation: We then bring in and properly compact a new, stable base of aggregate. This crucial step ensures the new asphalt has a solid platform.
- Install and Compact New Asphalt: Finally, hot-mix asphalt is laid in carefully compacted layers to create a seamless, durable, and long-lasting patch.
This process is far more involved than a simple patch job, but it’s the only way to permanently fix severe structural damage.
Frequently Asked Questions About Driveway Crack Repair
To wrap things up, let's tackle some of the most common questions homeowners ask us about keeping their asphalt driveways in top shape. Getting clear, straightforward answers can help you feel confident in your repair plan.
How often should I seal cracks in my asphalt driveway?
We always tell clients in Sonoma and Monterey County to inspect their driveway every spring and fall. Sealing new cracks as they appear—at least annually—is the single best thing you can do to prevent water from getting into the subgrade. For more robust protection, consider professional sealcoating every 3-5 years.
What is the best temperature to repair asphalt cracks?
Timing is everything for a lasting repair. For most cold-pour fillers, you need an air and surface temperature of at least 50°F (10°C). The forecast should show that temperatures will stay above that mark for a full 24 hours to let the product cure properly. Avoid applying on blistering hot days or when rain is expected.
Can I just pour cold patch into a pothole?
While it’s tempting to just dump a bag of cold patch into a pothole, the repair simply won't last without proper prep. You must clean out all loose debris, square off the edges of the hole to create solid walls, and apply the patch material in thin, compacted layers. If a pothole keeps coming back, it’s a clear sign of subgrade failure that needs professional attention.
My driveway has alligator cracks. Is it too late to save it?
Alligator cracking is a major red flag indicating foundation failure. While you can fill these cracks, it's a temporary, cosmetic fix because the weak base is still there. This kind of damage almost always needs a professional eye to determine if the area can be saved with a full-depth patch or if a complete rebuild is the only real long-term solution. You can explore some modern options in our guide to 5 smart paving trends California homeowners should know.
Why are there cracks along the edge of my driveway?
Edge cracks are incredibly common and are typically caused by a lack of support along the driveway's perimeter. This happens when soil erodes, water runoff washes away the base material, or heavy trucks drive too close to the unsupported side. Sealing the cracks is a good first step, but the real solution may involve reinforcing the edges with a gravel shoulder or having a professional rebuild that section with a properly compacted base.
If your driveway's problems seem bigger than just a few simple cracks, don't hesitate to get a professional opinion. The team at DW Excavation, LLC has the expertise to diagnose the true cause of asphalt failure and provide a solution that lasts, from proper grading to full-depth repairs. Contact us today to ensure your property is built on a solid foundation.